newline
Table of Contents
Why you should use Anki, and how to get started
GuideAugust 10, 2021
In simple terms, Anki is a flashcard program. But more than that, it’s a system that will never let you forget anything. As long as you do a regular review (daily is best, but every other day works too), you will always remember what you add to Anki. Read on for my opinion on why Anki is useful for everyone, and a simple ‘getting started’ guide.
What is Anki?
Anki is a program that will let you create various types of flashcards, and will then serve them up for review according to an algorithm designed to maximize recall. The flashcards can have text, images, sounds, videos, and mathematical equations (and if you need more, there are add-ons). When reviewing, you tell Anki how well you remembered the answer: immediately, with some difficulty, or not at all. Based on your answer, the program will decide how soon it should show you the card again.
Best of all, Anki is free software. It’s available for all computer operating systems for free. On Android, you can use AnkiDroid, which syncs with desktop Anki and is also free. On iOS, there’s AnkiMobile, which is paid (because it costs money to release apps on the App Store, and it’s also a way for Anki developers to make money).
Why is Anki useful?
If you’re a student, the answer is obvious. It’s a fantastic tool to remember concepts and definitions. After you learn something, put it in Anki and you’ll never forget it. If you need to cram for an exam that’s in two days, Anki is probably the most efficient way to do so.
Even if you’re not a student, Anki is still great for remembering things. If you’re learning a language in your free time, you can add new words to Anki, but it has many other uses. For example, if your hobby is music and you want to remember the notes that make up the B major chord, you can put it in Anki. Or if you want to remember how long you need to boil an egg depending on the style you want, put it in Anki. Or if you’re interested in how a car works and you want to remember the parts of an engine, put it in Anki. And so on.
My point is, everyone should have an Anki deck, because it takes care of knowing what you want to remember, while you can focus on the actual remembering.
How do you get started?
Anki has a fantastic online manual. You can download Anki here, or use a package manager on Linux (though the Anki website recommends downloading Anki directly from their website). On macOS, it’s also available on Homebrew.
Important concepts
Before we start, there’s a few important concepts I need to discuss.
Notes v.s. cards
Firstly, in Anki, you create notes: things that you want to remember. When creating a note, you choose a note type. Depending on the type you choose, the note will have several fields (parts), for example the front of a flashcard and the back. A note in the topic of Spanish vocabulary could be e.g. the word “repasar” in the front field, and “to revise” in the back field. A note then generates one or more cards (depending on the note type), which is what you review. If you later edit a card, you will simultaneously edit all cards related to it (i.e. those generated from the same note).
Note types
The next thing I want to tell you are the various note types that you have by default:
- Basic: the standard flashcard, with a “front” (e.g. a word) and a “back” (e.g. a definition). This generates one card, where you’ll be shown the front and you’ll have to recall the back.
- Basic (and reversed card): the same as Basic, but it generates two cards. One where you’ll be shown the front and have to recall the back, and one where you’ll be shown the back and have to recall the front (this one’s perfect for language vocabulary).
- Basic (optional reversed card): a combination of the previous two types. It has an extra field called “add reverse”; if you type something in the field, it’ll generate two cards, and if you leave it empty, it’ll generate only one card. This card type exists so that you don’t have to manually switch between the “Basic” type and the “Basic (and reversed card)” type.
- Basic (type in the answer): does what it says. You’re shown the front, and you have to type in the back, and then it shows you a comparison of what you typed in and what was in the ‘back’ field.
- Cloze: fancy word for “fill in the blanks”. You choose which parts of the “text” field should be hidden, and those show up as blanks when reviewing.
You can add more note types if you want, either by creating your own or via add-ons.
Decks
In Anki, you can create decks of cards, which are basically ‘groups’. You can also create sub-decks, e.g. you could have a ‘Languages’ deck with a ‘Spanish’ sub-deck.
Whether you put notes into decks separated by topic, or you put everything in one deck, is up to personal preference. As for me, I put everything in one deck (the default one), and add tags according to the topic (e.g. ‘biology’ and ‘cell_theory’, or ‘languages’ and ‘latin’). This way, when I do a review, I review all topics at once, which means that I don’t isolate knowledge into its respective areas. For me, a typical review session will have e.g. a question about a Russian word, then a question about XPath syntax, then a question about the functions of proteins in a cell’s plasma membrane, and then a question about a keybinding in Emacs. I feel like this leads to more interconnections between topics and more possible insight, and I also think I remember things better when I have to jump between topics. Another way of achieving the same thing while keeping decks separated by topic is via filtered decks.
Your first Anki deck
Let’s actually go through the typical workflow.
Open up Anki, and you’ll be greeted with this screen:
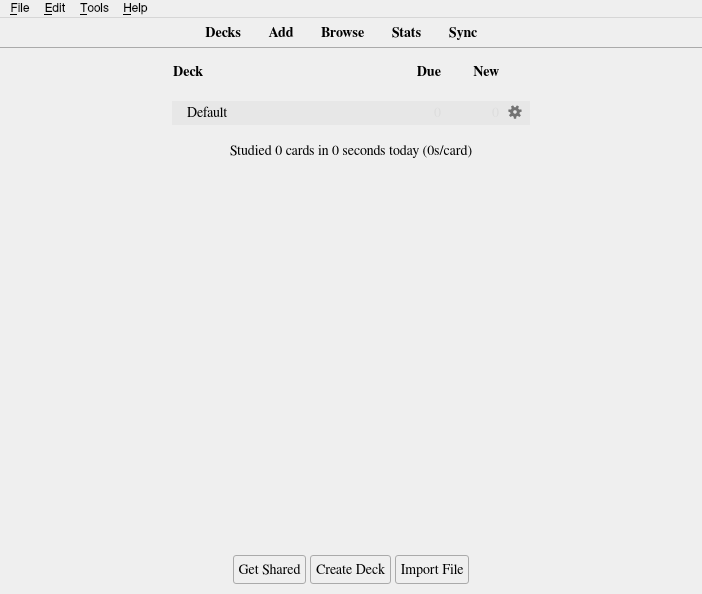
Where it says ‘Default’, that’s your list of decks. At the start, you only have one deck – the ‘Default’ deck (as for me, several hundred cards later, I still only have this one deck). At the top, the ‘Decks’ button brings you to this screen, the ‘Add’ button lets you add new cards, the ‘Browse’ button lets you browse your cards, the ‘Stats’ button shows statistics about your card collection, and the ‘Sync’ button syncs your collection to AnkiWeb (cloud storage for your cards).
Click ‘Add’, and a new window will pop up – this is where you add cards.
Basic cards
Let’s add a new Basic card. At the top, click to select a note type, and select the ‘Basic’ type. Then, make sure the deck is set to ‘Default’. In the “front” field, type “What is Anki?” In the “back” field, type “a free and open-source flashcard program using spaced repetition”.
It should look like this:
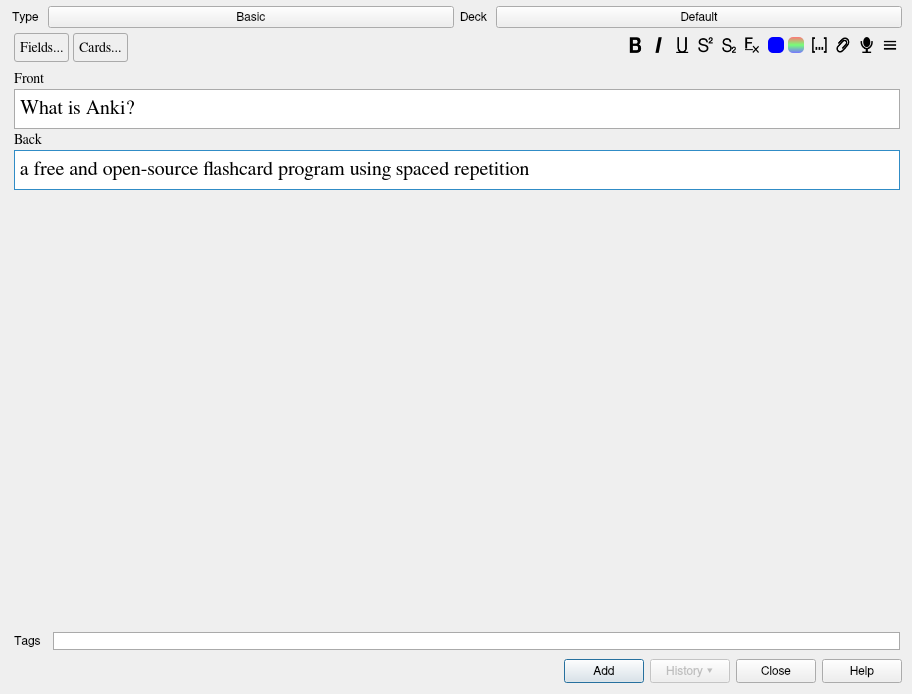
Click add, and it’ll say “Added” – you just added one card to your deck (and if you close this window and go back to the Decks view, it’ll say 1 in the “new” column for the Default deck).
Basic and reverse (plus an example of math typesetting)
Next, let’s add a note that includes a reverse, and let’s use this to see how math is typeset in Anki. In the ‘Add’ window, change the note type to “Basic (and reversed card)”. In the ‘front’ field, type “Pythagorean theorem”. Then, click inside the ‘back’ field, and then in the top right of the window, click the button with three lines next to the microphone icon. In the menu that pops up, click ‘MathJax inline’.
Those buttons in the top right handle formatting operations, and you can hover your mouse over them to find out their functions.
The “Back” field will now contain \(\), which is MathJax syntax for a math equation.
Anything after the first opening parenthesis and before the second backslash will be formatted as math.
After the first opening parenthesis in the “Back” field, type a^2 + b^2 = c^2, which is the Pythagorean theorem for a right triangle.
If you want, you can add tags in the bottom field, for example ‘mathematics’ and ‘trigonometry’; use the underscore symbol to separate words in a tag, as spaces separate tags themselves.
The window should look something like this:
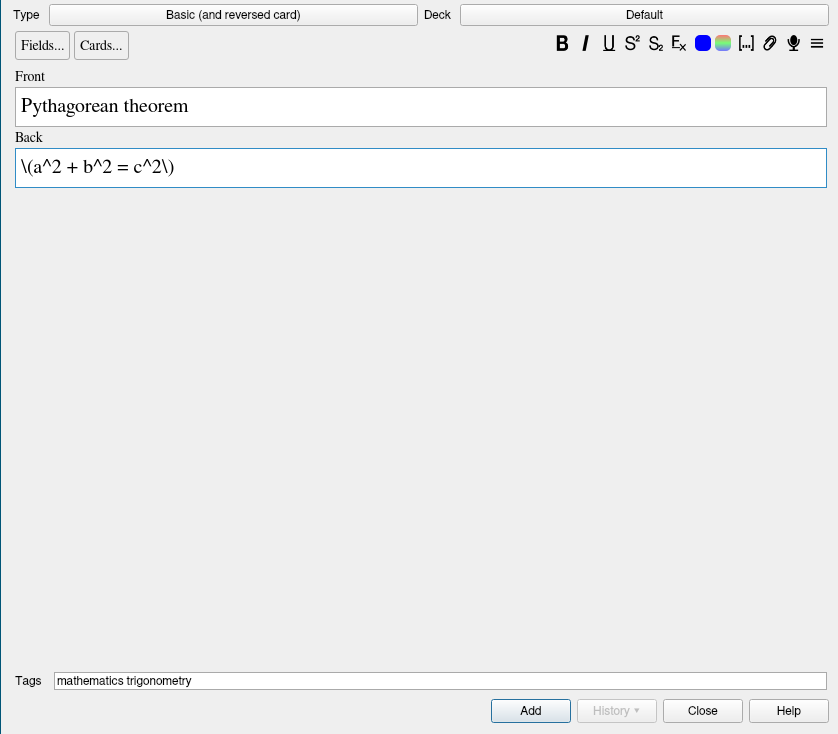
Click ‘add’, and you just added two new cards to your deck: one which asks you to recall the equation for the Pythagorean theorem, and one which asks you to recognize that the equation is the Pythagorean theorem.
Cloze
Finally, let’s add a Cloze (fill in the blanks) card.
In the ‘add’ window, change the note type to Cloze.
Then, in the ‘text’ field, type: “A Cloze test asks you to fill in the blanks.”
Select the words “fill in the blanks” with your mouse, and click the button in the top right that looks like this: [...] (if you hover over it with your mouse, the tooltip will say “Cloze deletion”).
The highlighted text (fill in the blanks) will change to {{c1::fill in the blanks}}.
c means that this is a Cloze instance (a blank to fill in), and 1 means that it’s the first instance.
You can have several Cloze instances; if they’re numbered the same (e.g. c1), the note will generate one card that will hide/show all Cloze instances at once.
If they’re numbered differently (e.g. you have c1 and c2), one card will show/hide all c1, and another will show/hide all c2.
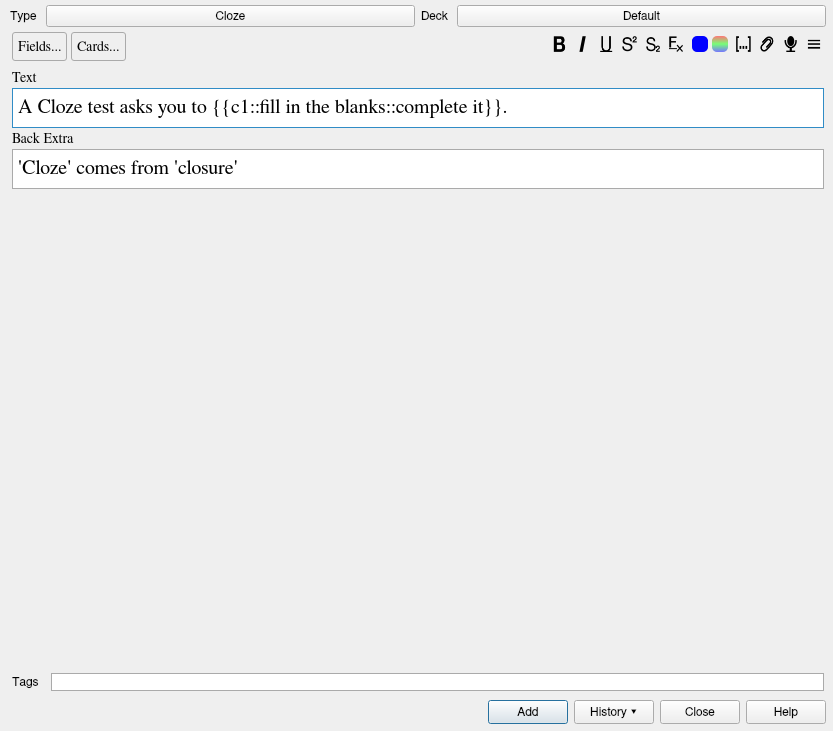
Let’s add a hint to this Cloze instance: in the ‘text’ field, change {{c1::fill in the blanks}} to {{c1::fill in the blanks::complete it}}.
This means that when asking you to fill in the blank, you’ll be shown the text “complete it” as a hint.
The ‘extra’ field can contain any extra information, such as mnemonics. Type in the text: ‘Cloze’ comes from ‘closure’.
Any tags you previously added will still be in the tags field, change this however you want.
The window should now look something like this:
Click add, and your note is now in your deck.
Reviewing your Anki deck
Let’s go through the revision workflow. Close the ‘Add’ window, and go back to the main screen with the list of decks.
If you’ve been following along, the Default deck should now have the number 4 in the ‘new’ column, signifying that there are 4 new cards that have not yet been reviewed. Click the Default deck, and click ‘study now’. You’ll be presented with the first card. Try to think of the answer, then click ‘show answer’. If you got the answer correct after some thought, click ‘good’. If you got the answer instantly, click ‘easy’. If you didn’t know the answer, or it was incredibly hard to think of it, click ‘again’.
Once you go through the whole deck, Anki will tell you that you finished your review. Click the ‘Sync’ button at the top, go through the steps to create and sign in with an AnkiWeb account, and sync your data to AnkiWeb. While Anki can work entirely offline, I recommend you sync it with AnkiWeb, because it’ll also let you review on other devices (e.g. on your phone when you’re waiting for the bus).
Closing comments
So, now you’ve hopefully understood why Anki is useful for everyone, and how to add and review cards. Once you get comfortable with the basics, I recommend getting the Image Occlusion add-on, which is basically Cloze for images (you can blank out parts of an image, such as labels on a diagram of a car engine). There’s a bunch of other ones here, but don’t go overboard – only install things if you know you need them. Read through the Anki manual to see what features Anki offers out of the box (there’s a ton of them).
There are also some articles on Anki that I recommend reading:
- Anki Tips: What I Learned Making 10,000 Flashcards
- How To Use Anki: An Efficient Tutorial For Beginners
- How To Create An Anki Deck That Maximizes Learning
- How To Make Better Anki Flashcards: Principles For High-Quality Questions
Have fun!